Selecting the wrong manufacturer often starts with an incomplete brief. Before reaching out to a single supplier, you need a clear technical baseline — one that covers material behavior, production scale, tooling durability, and dimensional accuracy.
Plastic injection molds are highly engineered assets, and their performance is only as strong as the specifications behind them. Use this checklist to lock down your requirements before any conversation begins:
- Resin type and shrinkage rate: Different polymers — PP, ABS, PC, nylon — shrink at different rates. Document the exact grade and its published shrinkage range to ensure cavity dimensions are compensated correctly.
- Cavitation based on annual volume: A single-cavity tool suits low-volume runs; high-volume programs typically demand multi-cavity or family molds to hit cost-per-part targets.
- Mold base steel selection: P20 suits general-purpose tooling, while H13 handles high-heat resins and longer run cycles. As research from the DiVA Portal’s research notes, mold steel directly impacts coolant circulation and overall tool longevity.
- Critical dimension tolerances: Define GD&T callouts early. Tighter tolerances drive tooling cost and cycle time, so prioritize which features are truly critical.
Material selection is a make-or-break decision — the wrong steel grade accelerates wear and inflates long-term maintenance costs. If you need guidance on production tooling standards, reviewing certified manufacturing benchmarks is a practical starting point.
With these specifications documented, you’re ready to evaluate whether a manufacturer’s engineering team is equipped to support your design — starting with how they vet their own network of experts.
Step 1: Vet the Manufacturer’s Network of Experts
Once your technical requirements are defined, the next filter is human capital. Machinery alone doesn’t produce precision molds — the engineers interpreting your tolerances do. A company’s network of experts provides the essential bridge between a digital design file and a manufacturable physical tool.
The clearest distinction to make early is between a vendor and a service provider. A vendor quotes your design as-is. A service provider pushes back — flagging wall thickness issues, gate placement risks, or cooling inefficiencies before a single cavity is cut. Platforms that return proactive DFM feedback before production begins are a strong signal of a true service partner.
Use this table to evaluate the key roles within any mold making operation:
| Role | Expertise Needed | Red Flag |
|---|---|---|
| DFM Engineer | Gate design, draft angles, parting line strategy | No in-house DFM; design review is outsourced or skipped |
| Cooling Analysis Specialist | Thermal simulation, conformal cooling layout | No mention of cooling analysis in the quoting process |
| Application Engineer | Experience with your specific industry (medical, automotive, consumer) | Generic portfolio with no relevant case examples |
Ask directly: Who reviews my design before tooling begins, and what is their process? If the answer is vague, treat that as a disqualifying signal. The right partner will name their process and the people behind it.
With human expertise validated, the next logical step is confirming whether the facility’s equipment can actually execute to the tolerances your design demands.
Step 2: Audit the Mold Making Facility and Equipment
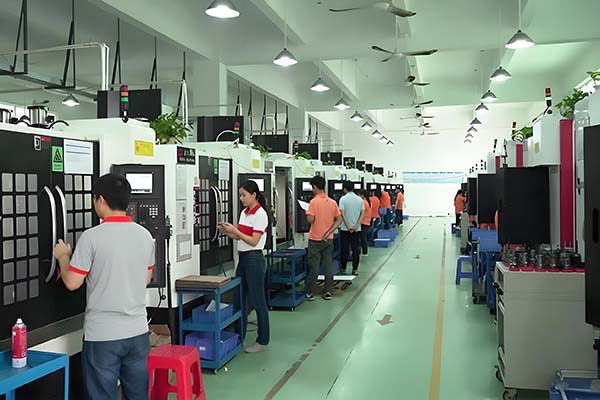
With your technical requirements documented and your engineering team evaluated, the next filter is physical infrastructure. A qualified mold making manufacturer must have the machinery and measurement systems to back up every claim made during the sales process.

In practice, facility audits reveal gaps that no brochure will mention. Request an on-site visit or, at minimum, a detailed equipment list with machine model numbers and calibration records. What you’re looking for follows a clear hierarchy:
- Review CNC and EDM machine tolerances — Confirm that multi-axis CNC centers and electrical discharge machining (EDM) equipment can hold the tolerances your part geometry demands. Understanding how tight-tolerance machining works in practice helps you ask the right questions on the floor.
- Check for cleanroom capabilities — Medical and electronics applications often require controlled environments. Verify ISO cleanroom classifications before assuming this is available.
- Verify CMM and quality control equipment — Coordinate Measuring Machines confirm dimensional accuracy at every production stage. Without them, defect detection is reactive, not preventive, according to Race Mold Group’s selection criteria.
- Look for a circular maintenance model — Top-tier manufacturers — many leveraging 50+ years of market experience — treat tooling maintenance as an ongoing system, not a reactive repair schedule.
However, physical infrastructure only tells half the story. A facility’s equipment matters far less if the design-for-manufacturability analysis feeding that equipment is flawed — which is exactly what Step 3 addresses.
Step 3: Request and Review Detailed DFM Reports
Knowing how to select a mold manufacturer ultimately comes down to evaluating what they deliver before cutting steel. A Design for Manufacturability (DFM) report is that deliverable — and reading it critically separates capable partners from ones simply quoting a price.
There’s an important distinction here: you want a manufacturer responsible for providing a comprehensive simulation, not just one that provided a document to check a box. Accountability matters as much as output.
Work through the report in this order:
- Gate locations and parting lines — Confirm gate placement minimizes weld lines on cosmetic surfaces. Parting lines should fall in non-critical zones agreed upon in your design specs.
- Draft angle recommendations — Verify the report flags any walls below 1°–2° of draft. Insufficient draft causes drag marks and costly ejection failures.
- Cooling channel layout — Evaluate whether the proposed channels support balanced, uniform heat removal across the cavity. Poor cooling is a leading driver of extended cycle times and warpage.
- Mold-fill simulation data — A credible report includes flow analysis visuals showing fill patterns, pressure distribution, and air trap locations.
Common error: Accepting a DFM report with generic, non-specific draft recommendations not tailored to your specific resin’s shrink rate.
Common error: Overlooking an absent cooling simulation — this gap frequently surfaces later as a warpage problem during sampling.
Once you’ve validated the DFM report, the real proof arrives with physical parts — which is exactly what the T1 sampling process confirms.
Step 4: Execute the T1 Sampling and Validation Process
With your DFM report approved and steel cut, the T1 sampling trial run is the final procedural checkpoint before committing to mass production. Think of it as a live stress test — every defect surfaced here is far cheaper to fix than one discovered in a production run. Following a structured approach, similar to what you’d find in any rigorous injection molding tutorial, keeps this phase objective and documented.
The five sub-steps of a T1 trial:
- Compare parts against the 3D model. Measure critical dimensions using CMM or calipers and verify they fall within your specified tolerances.
- Document cosmetic and structural defects. Flag any flash, sink marks, warping, or short shots with photographs and written annotations tied to the cavity location.
- Request a scientific molding data sheet. This documents the exact process window — melt temperature, injection speed, hold pressure, and cooling time — used to produce the samples.
- Confirm the adjustment protocol. Ask the manufacturer to outline their steel-safe modification process and expected turnaround before a T2 trial begins.
- Establish the Golden Sample. Once an approved part is produced, a physically validated reference part is locked as the acceptance benchmark for every future production run.
The Golden Sample result is a signed-off physical part plus its accompanying process data sheet, together forming an unambiguous quality baseline. How you manage this benchmark — and every subsequent mold modification — connects directly to the long-term value of your tooling investment.
How to Evaluate the Key Takeaways for Long-Term Success
Every decision you make when you set up mold production has compounding consequences — a weak early choice can cost significantly more to fix downstream than it would have to get right from the start. These four principles distill the entire selection process into actionable priorities.
- Prioritize expertise over price. The lowest bid rarely accounts for rework, delayed timelines, or scrap rates. A manufacturer’s technical capabilities and process controls matter far more than their opening quote.
- Demand a solutions provider, not just a parts supplier. The right partner proactively flags design risks, suggests material alternatives, and communicates openly. As noted by researchers at the DiVA Portal’s research, “the core value is not just the product, but the circulation and prolongation of the product’s lifetime” — a mindset that separates genuine partners from transactional vendors.
- Maintain a rigorous audit trail. Every mold modification, engineering change order, and trial result should be documented. This paper trail protects your IP and accelerates future production runs.
- Think in lifecycles, not launches. A quality tool can produce hundreds of thousands of parts over its lifespan. Circular value — maintenance schedules, steel quality, and requalification planning — determines your true cost per part.
The manufacturer you select today shapes your production economics for years; choose a partner who invests in the full lifecycle of your tool, not just the first shot.
How to Answer Common Questions About Mold Making Manufacturers
What is a business that provides a service called in this industry? In plastic injection molding, a business delivering technical manufacturing services is typically called a service provider or contract manufacturer. Under formal agreements, the Law Insider definition establishes that a “Providing Company” is the entity legally responsible for delivering specific technical services under contract — a distinction that matters when assigning liability for tooling defects or production delays.
What is the difference between a mold maker and an injection molder? A mold maker designs and machines the steel tooling itself. An injection molder uses that tooling to produce parts at volume. Many facilities offer both, but confirming which scope applies to your contract prevents costly gaps in accountability.
How do I verify a manufacturer’s network of experts? Request documented credentials — engineering certifications, metrology equipment lists, and supplier audits. Prototool’s guidance on selecting injection molding companies recommends evaluating DFM capability and in-house tooling depth as direct proxies for genuine expertise. You can also review how rigorous dimensional inspection programs work to benchmark what a rigorous quality network looks like in practice.
What should a “providing company” definition include in a contract? At minimum, the clause should specify the entity’s legal name, defined service scope, ownership of tooling IP, quality acceptance criteria, and escalation procedures — leaving no ambiguity over who is responsible if a T1 sample fails validation.